- String
- Posts
- Git/ Software Version Control for beginners
Git/ Software Version Control for beginners
Understanding branches, pulling, cloning and merging code
String Team & Kahhow Lee
September 21, 2023
This article will cover:
What is Git?/ Why should teachers care?
How to setup using SourceTree
How to clone code from an existing repository
How to push code to Github so others can see/ use it
Handling changes: How to create, switch and merge branches
Think of this article as a pre-reading for CherGPT Starter Kit (creating your own AI assistant) or picking up some skills to test the latest cool experimental code available on Github which are aplenty!
1 What is Git?
Think of it as Google docs but for code
A distributed version control system that tracks changes in any set of computer files, usually used for coordinating work among programmers.
Why should teachers care?
Usually, very experimental tech will be on Github. You get to go straight to the heart of experimentation and maybe eventually partake in it as a contributor.
2 Setting up
Pre-requisites
a) Have/ setup a Github Account
b) Download a GUI*: SourceTree | Please feel free to consider other alternatives like GitHub Desktop or GitKraken but this tutorial will focus on using SourceTree for simplicity
*GUI: Graphical User Interface. An alternative to do Git is to do it directly in the terminal for Mac/ Linux users
After installing, you will be brought to a screen to add account:

In the bottom left corner, click the button: Add.
In the first selection, host, select: GitHub > Connect Account. This should trigger a tab to authenticate in GitHub.

Once done, click Save and you should see your account being displayed:

Your account will be used by default
3 Cloning a repository
A repository is an existing codebase. Often times, you may clone from a codebase to test the application or make suggest changes.

By cloning a repository, you are taking the code from the origin and putting it into your local computer
In SourceTree, there should be an open window that looks like this.
Click New > Clone from URL:

For practice, you can use this URL: https://github.com/String-sg/git-practice.git.

You can find the clone URL nested under the <> Code button of the Github repository
After keying in the URL in SourceTree, you should see this screen being populated with information:

Under Advanced options, you may
NOTE: If you’re cloning from a private repository, you need to add your personal access token followed by a @ in the Source URL. For all the repositories referenced in this article, they are public so there is no need for this. It will look something like the following:
https://{personal_access_token}@github.com/{github username}/{name of repository}.git
If you did the steps above successfully, you should see the repository listed:

Congratulations on cloning your first repository!
If you go to https://string-sg.github.io/git-practice/ - this is the live site that you will make changes to. It may look slightly different from the screenshot below as more changes might have been merged in:

Site as of 19 Sep 3.35pm
4 How to push code
This particular file that we will be working on is in markdown format

Image from markdown.org
If you have been formatting text in Telegram or Notion, you probably might have been formatting text in markdown without realizing.
You can read more about markdown here.
Our first practice is just pushing code straight to the main repository or codebase. This essentially means making changes directly to the main code.
For the record, this is NOT best practice so it is just our first step (we will learn how to do it properly in section 5).
In Sourcetree, click Show in Finder in the top right corner.

This should open finder (Mac) or file explorer (in Windows)

Click into the folder git-practice.
In the folder, there should only be one file README.md > Open with > Visual Studio Code (or any other code editor of your choice).

If you don’t have Visual Studio Code (a code editor), you can download it here.
In Visual Studio code, you should see all existing lines of code in README.md. In this example, I am just adding a random line, line 4:

You will notice a circle beside the file which indicates that changes are not saved.
To save: ctrl + S (Windows) or cmd + S (Mac).
Once you have saved your changes, you will see it in SourceTree as uncommitted changes.

Click on the top left corner in the circular button: commit
You will notice that the changes are highlighted in green - a new line was added at line 2 and line 4 as well as 5:

We will start with the negative example by pushing changes directly to origin/main:

You may be prompted to login with your github credentials again.
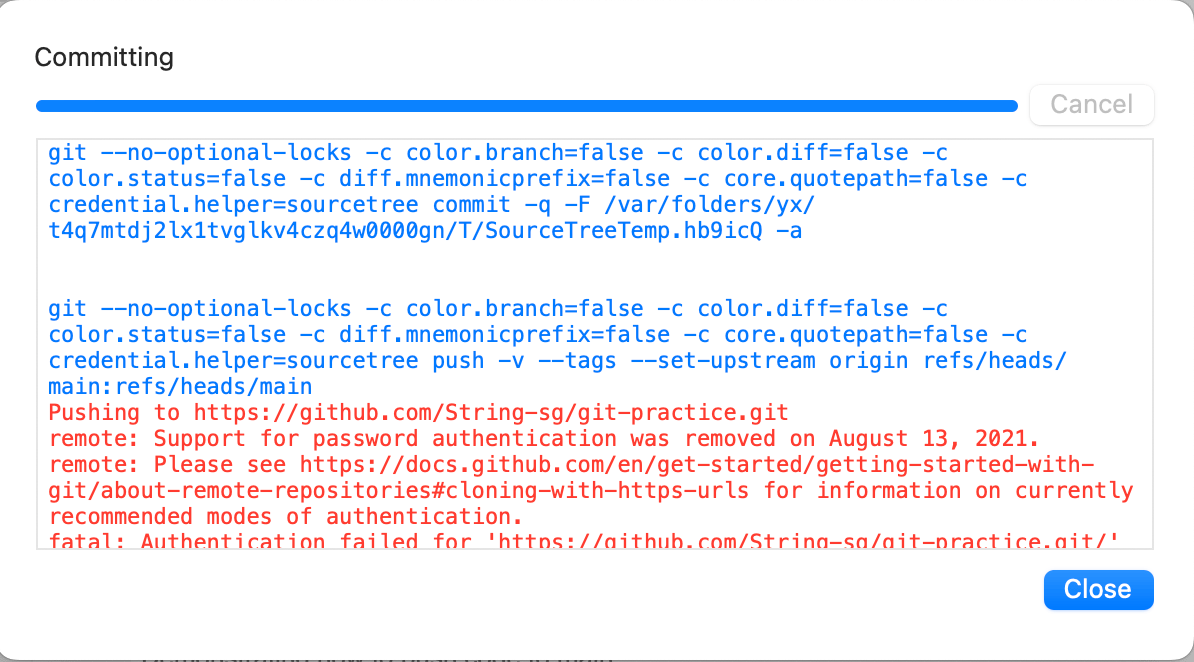
If you face an error, you can try hitting on the push button.
The changes are live at: https://string-sg.github.io/git-practice/

🎉 Congratulations on pushing your first line of code to the internet!
5 Handling Changes
5.1 Creating your first branch
Branches a you to develop features, fix bugs, or safely experiment with new ideas in an isolated area of your codebase (repository).
Click on Branch:

In this example, I will create a branch called self-intro. Some teams indicate the type of change in the name of the branch, e.g. feat (feature), fix, etc and typically the branch is named in a way that makes sense

In your side bar, you will notice that your branch is now indicated with a circle:

5.2 Merging Branches
At some point after testing your changes, you would want to merge it back into the main code base and share it with your team (or the world)
Just like step 4, let’s make some changes to the code and save:

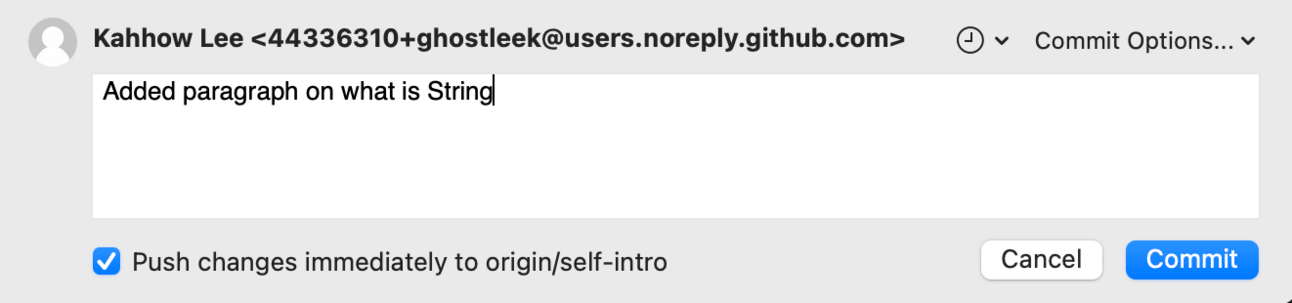
After saving, you will see uncommitted changes, so let’s commit those:

I will add a short commit message to describe what I have done:
Let’s now go to the repository in Github:

You will notice a banner that shows that we made changes on a branch. Click on Compare & pull request.
After writing a simple summary to describe the change - this is usually for the sanity of your team to understand your changes, especially if complex/ extensive, for code review - you can press create pull request

Usually by this step, you are done.
Your team mate will probably review the code, leave comments or if it is good to go, they will click the big green button: merge pull request:

To minimize spam, I will opt to delete the branch after merging:

If you click on the URL, you will notice that it is broken/ does not work! O:
Will leave it up to you to try to open a pull request to try to fix it.
5.3 Pulling latest changes to the code
The last thing left is just pulling the latest code from Github. Many people made have made changes to the code while you were away and hence you may need to pull the latest version of the code periodically instead of just relying on what you have on your local computer.
Under Branches > right click main > checkout main - this will switch your code to the main branch.

In my example, you see 3 behind in blue- what we have locally is not the most updated.

Let’s click on the pull button in the top menu:

Now you have access to the latest code(:
If you have managed to stay with me till this point, you would have learnt the bare basics of Git and can pull, push with a proper branching approach instead of directly messing with the main code base (you should never push directly to main).
6 What is next?
Bonus: getting started with CherGPT Starter Kit
If you are comfortable with the basics of Git, try cloning CherGPT Starter Kit above and setting it up!